
We recently posted a guide on how to root a OnePlus 3. A lot of people wanted to know How to root OnePlus 3 with Mac. So I researched a bit and found out its even simplar. So I will be showing you a guide on how you can root you new OnePlus 3 with a Mac.
Make sure to backup your phone’s data before proceeding
Root OnePlus 3 with Mac
Perquisites
Download these files on your Mac
TWRP – http://bit.ly/28K16cs
SuperSU – http://bit.ly/28JsPLI
ADB for MAC – http://d-h.st/n5I
Android File Transfer – https://www.android.com/filetransfer/
Once you have downloaded the files mentioned above, Install Android File Transfer software. follow the steps below
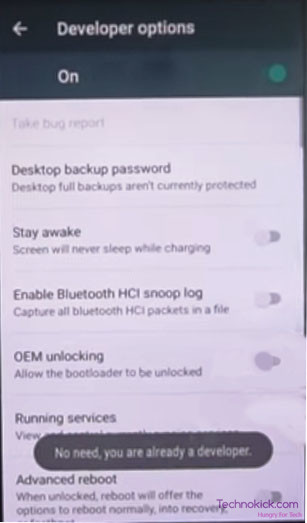
- Go to Settings and enable developer options by tapping build number 8 times. (Settings -> about -> build number).
- In settings now you will find Developer options, Enable it and then enable OEM unlocking, advanced reboot, and USB debugging.

- Now long press the power button and select Reboot, now select “Reboot into bootloader mode”. After this, connect your phone to your Mac via the USB cable provided with the phone.
- Extract the ADB files on your Desktop (As it is).
- Open the terminal window by pressing on the launchpad and then searching for terminal.
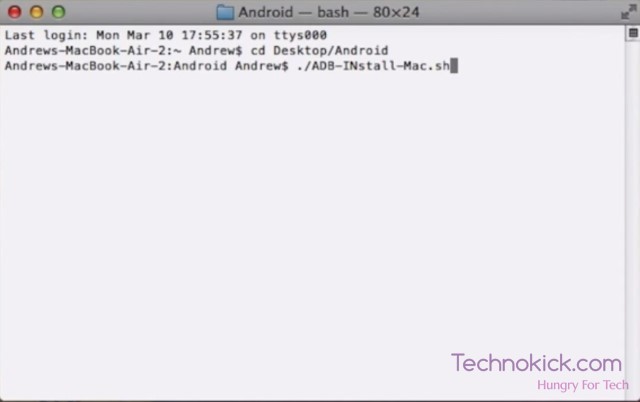
Root OnePlus 3 with Mac - Enter following code and then press return on your keyboard-
cd Desktop/Android - Now again type this code and press enter(with ./)-
./ADB-Install-Mac.sh - It may ask for your password. This will install the ADB on your PC
- Now to check if the ADB has been correctly installed, type the following code and press Return. You should see your OnePlus3 in the list.
./adb devices - Now type the following code and press enter-
Once you type this, you will get an option on your phone asking to unlock the bootloader. Use the volume navigation keys and select the appropriate option and press the power button../fastboot oem unlock - Now remove your phone from PC, Your phone will be switched off. Press volume up and power button at the same time and fastboot should load. Now again connect it to the Mac. In your Mac, copy the TWRP file and paste it in the Android folder( On your Desktop). Now type the following code in the terminal window which was opened
cd Desktop/Android
./fastboot flash recovery.img - Now remove the phone from your mac, power on your phone and complete the initial setup. Now connect the phone again to your Mac via the USB cable provided. Open Android file transfer and transfer the Super SU file from your Mac to your phone.
- Now open your recovery(Volume up + power button), select install and select the SuperSu file from the list. Now swipe to flash it. Once done, reboot your device and now you successfully have your phone rooted.
Now to check if the phone is rooted or not, just download this app from play store called Root Checker.
You now have access to your bootloader and you can install Xposed Modules etc, and you can also access the root directory files and tweak internal settings. This completes the procedure to root your OnePlus 3 Smartphone.
Hi, not working for me at step 11.
When I exactly follow your instructions, it says no file found but when I additionally do cd Mac and then give the “./fastboot flash recovery.img” command I get this:
unknown partition ‘recovery.img’
error: cannot determine image filename for ‘recovery.img’
How do I proceed?
Thanks.
Hi!
I used this to root my phone yesterday and had the same problem- on step 11.
Make sure you do Step 1 and 2 after you unlock the bootloader because this wipes your phone and the developer options go back to default.
When you’re back into fastboot after that, you type “./fastboot flash recovery recovery.img”. Here, you’re telling your computer to flash recovery.img to the recovery partition of the phone- hence why you got that error message.
I don’t think there are any other issues after that.
Happy rooting!
The Actual command is ./fastboot flash recovery recovery.img.
Here is the final step-by-step guide after trying to root my phone for the last 4 hours.
1. You don’t need to change the file in folder Mac to _Mac.. just stick to original adb and fastboot
2. for step 9 onwards, you need to be in Mac directory, so Terminal: cd Desktop/Android/Mac
3. Same goes with step 10, 11 you need to be in Mac directory to properly execute the command
Good Luck!
Step 11 (opening recovery) does not bring up any menu where we could select install.
The available options are either to Install via ADB or sideload. Would appreciate help.
OxygenOS 3.2.6 Sept 1 Security Patched
Can’r open the recovery.img file on my mac? should i be able to or should i put it into the files as it is when i download it?
On point 9 when it put ./adb devices, it shows me the sentence: no such file or directory.
Should i assume it didn’t work properly?
Found mistake in commands.
in Folder Mac put at the end of “adb” and “fastboot” “_Mac” because in script was these names of files, but someone changed it and made a lot of problems, I spent 2 hours to understand what was wrong. so u will have in folder Androin/Mac “adb_Mac” and “fastboot_Mac”
Try this. it worked for me
cd /usr/bin/
./adb devices
or
cd /usr/bin/
./adb_Mac devices
Tried what you said.. goes like this:
cd /usr/bin/
./adb devices
List of devices attached
cd /usr/bin/
./adb_Mac devices
No such file or directory