
It has been more than a month since Microsoft launched the Windows 10, Like always people are facing a bunch of issues on the newly launched OS. A lot of people reported that they are facing some issues with their WiFi and windows 10 is not recognising the WiFi at all. So today I will tell you some simple methods which can fix almost every problem with wi-fi on windows 10, So let us start Windows 10 not recognising the WiFi.
Solution – Windows 10 not recognising the WiFi
Method One – Updating the driver
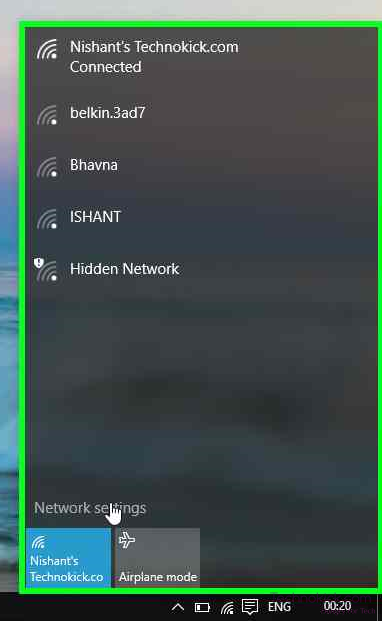
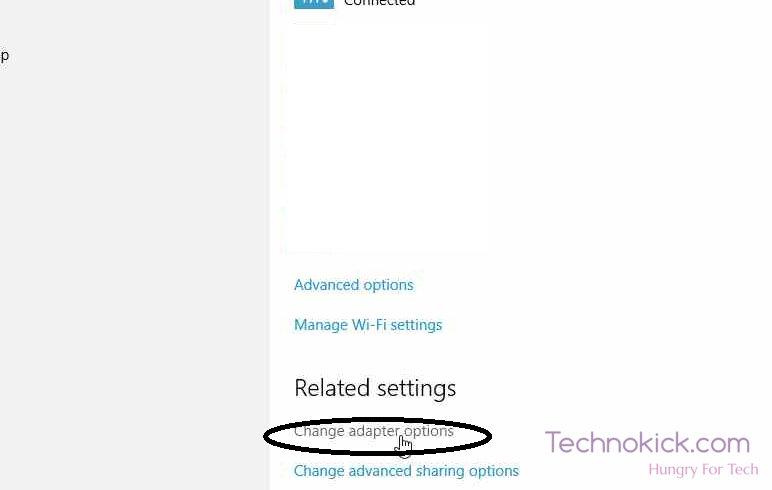
Step 1) You need to check the name of your wireless adapter, for this, Go to the wireless logo on the right side of Task bar, Press Network Settings, Click on change adapter Settings.
Step 2) Now identify your adapter and right-click on it, click on Properties.
Step 3) Copy the Name of your Driver mentioned their.

Step 4) Go to a machine which is connected to the internet, it might be your phone or any other PC near you.
Step 5) Search for the driver of the adapter which we earlier saw.
Step 6) Copy the driver files to your PC which is having wi-fi problems.
Step 7) Again go to the Properties of you adapter which we showed you from Step 1 to Step 3.
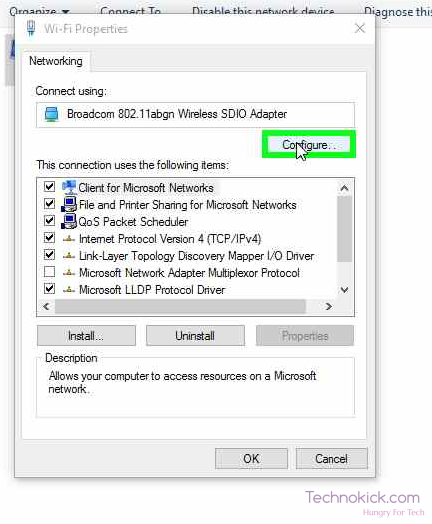
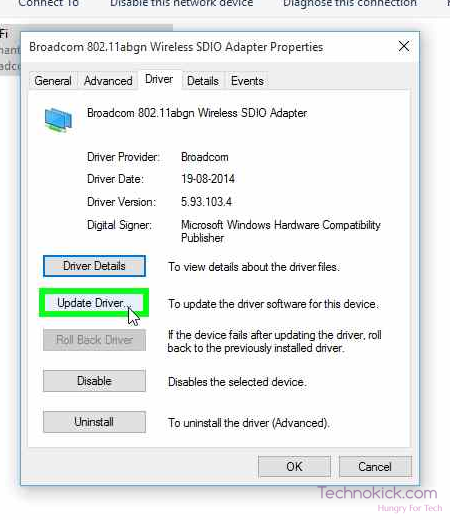
Step 8) Click on Configure, then you will find a tab named “Driver”, Click on it and press “update Driver”.
Step 9) Select Browse my computer and browse for the driver zip, Now just press “OK”

Step 10) Wait for it to complete and restart the PC. If you are still facing the problem, see Method 2.
Method 2 – Editing the Registry (Safe)
Step 1 – Open CMD with Administrator privileges. To do this, click on the Windows Button > Search for ‘CMD’ > Right Click on CMD > Run as Administrator.
Step 2 – Copy-Paste or type out the following command in the window, then hit the Enter key
reg delete HKCRCLSID{988248f3-a1ad-49bf-9170-676cbbc36ba3} /va /f
Step 3 – Enter the below command into the Command Prompt and hit Enter.
netcfg -v -u dni_dne
Step 4 – Restart the PC and then check your WiFi settings. You should now see a list of all of the available networks within range.
Now your problem should have been probably fixed, If you are still facing the problem, comment below and let us know. We will try our 100% in finding a solution for it.