
After upgrading to Windows 10, a large number of users have reported that their wireless devices are no longer working. Restarting and/or reinstalling the wireless network adapter driver does not appear to solve the issue. Even when done several times. According to a Microsoft statement regarding the issue, this problem is triggered by incompatible VPN software present on the PC during the Windows 10 upgrade. The issue also seems to effect a wired Ethernet connection from working properly, on some computers
“The issue may occur if older VPN software is installed on Windows 8.1 and is present during the upgrade to Windows 10, older software versions contain a Filter Driver (the Deterministic Network Enhancer) which is not properly upgraded, leading to the issue.” – Microsoft.
The Fix
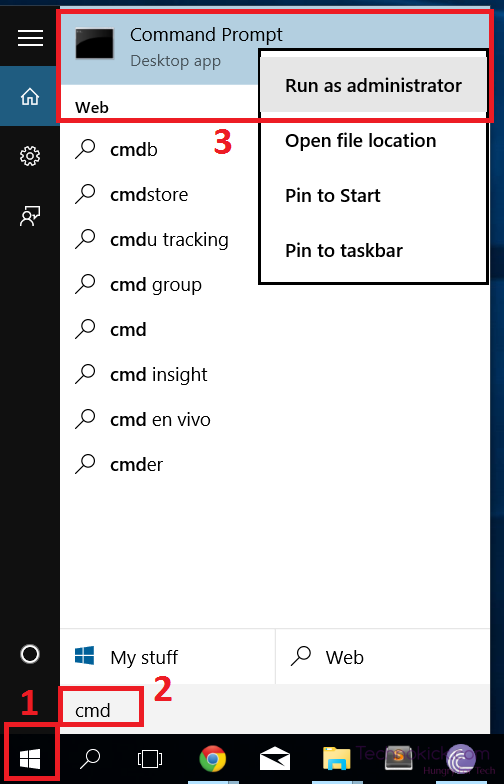
Step 1 – Open CMD with Administrator privileges. To do this, click on the Windows Button > Search for ‘CMD’ > Right Click on CMD > Run as Administrator.
Step 2 – Copy-Paste or type out the following command in the window, then hit the Enter key
reg delete HKCRCLSID{988248f3-a1ad-49bf-9170-676cbbc36ba3} /va /f
Step 3 – Enter the below command into the Command Prompt and hit Enter.
netcfg -v -u dni_dne
Step 4 – Restart the PC and then check your WiFi settings. You should now see a list of all of the available networks within range.
If you are running a VPN, uninstalling the software before upgrading your PC to Windows 10 is advised to avoid this issue.